PowerPoint Presentation
Scene 1 (0s)
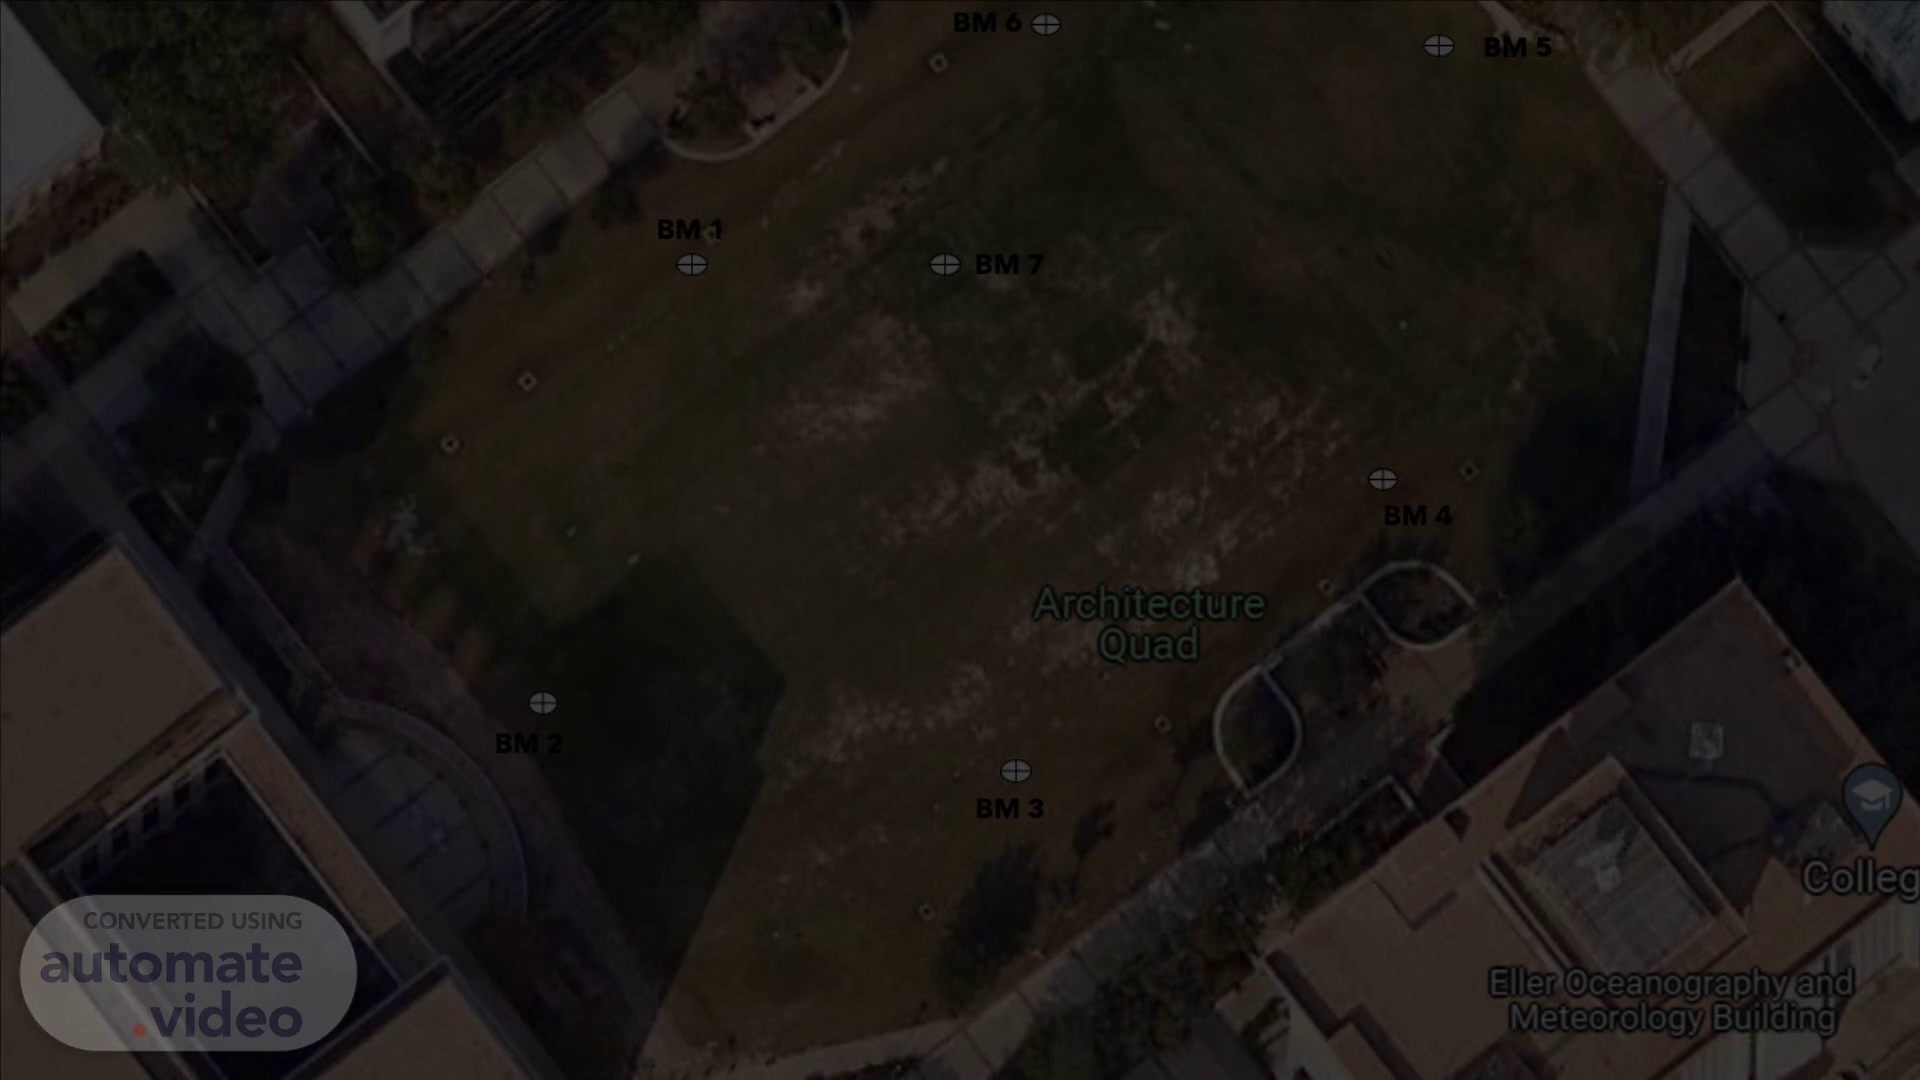
[Audio] This is the layout of your East Quad and the positions of all the benchmarks that we will be using for this lab..
Scene 2 (6s)
[Audio] For setup -1, the operator will walk from their assigned benchmark (BM-1 for example), to BM-7 and count their number of steps..
Scene 3 (17s)
[image] Aerial view of a green field Description automatically generated.
Scene 4 (19s)
[image] Aerial view of a green field Description automatically generated.
Scene 5 (21s)
[Audio] Then they will walk back halfway towards the same line, turn 90 degrees and step away 5 steps..
Scene 6 (29s)
[image] Aerial view of a green field Description automatically generated.
Scene 7 (31s)
[Audio] This will be the position where the operator will setup their instrument..
Scene 8 (38s)
[Audio] After setting up the instrument the operator will backsight at Benchmark-7, take the 3 wired reading and note these values in their respective field books as shown in the pdf. Remember, Field Books are mandatory for everyone. You will face severe point deductions if you do not have your own Field books..
Scene 9 (56s)
[Audio] After back sighting benchmark 7, we will now foresight at Benchmark 1 and fill our field book entries as required..
Scene 10 (1m 6s)
[Audio] Now we are ready to move to our next setup. We will dismount our instrument and a new operator will walk from benchmark 1 to benchmark 2 and count their steps..
Scene 11 (1m 17s)
[image] Aerial view of a green field Description automatically generated.
Scene 12 (1m 19s)
[image] Aerial view of a green field Description automatically generated.
Scene 13 (1m 21s)
[Audio] Then they will walk back halfway towards the same line..
Scene 14 (1m 25s)
[Audio] Turn 90 degrees and move away 5 steps. This is where the second operator will setup their instrument..
Scene 15 (1m 33s)
[Audio] After setting up the instrument the operator will backsight at Benchmark-1, take the 3 wired reading and note these values in their respective field books as shown in the pdf..
Scene 16 (1m 44s)
[Audio] After back sighting benchmark 1, we will now foresight at Benchmark 2 and fill our field book entries as required. This completes our setup 2..
Scene 17 (1m 55s)
[Audio] Now the same procedure can be followed for the rest of the setups. You can also look at the top left corner of the screen for the steps, which are already color coded to help you understand much better..
Scene 18 (2m 7s)
[image] Aerial view of a green field Description automatically generated.
Scene 19 (2m 11s)
[image] Aerial view of a green field Description automatically generated.
Scene 20 (2m 15s)
[image] Aerial view of a green field Description automatically generated.
Scene 21 (2m 19s)
[image] Aerial view of a green field Description automatically generated.
Scene 22 (2m 23s)
[Audio] Our last step will be to come back at Benchmark 1, follow the same procedure between Benchmark 1 and benchmark 7 to close our loop and check for any errors. The elevation of Benchmark 7 after this step should match the value of your known benchmark provided to you at the beginning..