Scene 1 (0s)
Execution Plan for Construction of Valves. Step-by-Step Workflow with 3D Infographics.
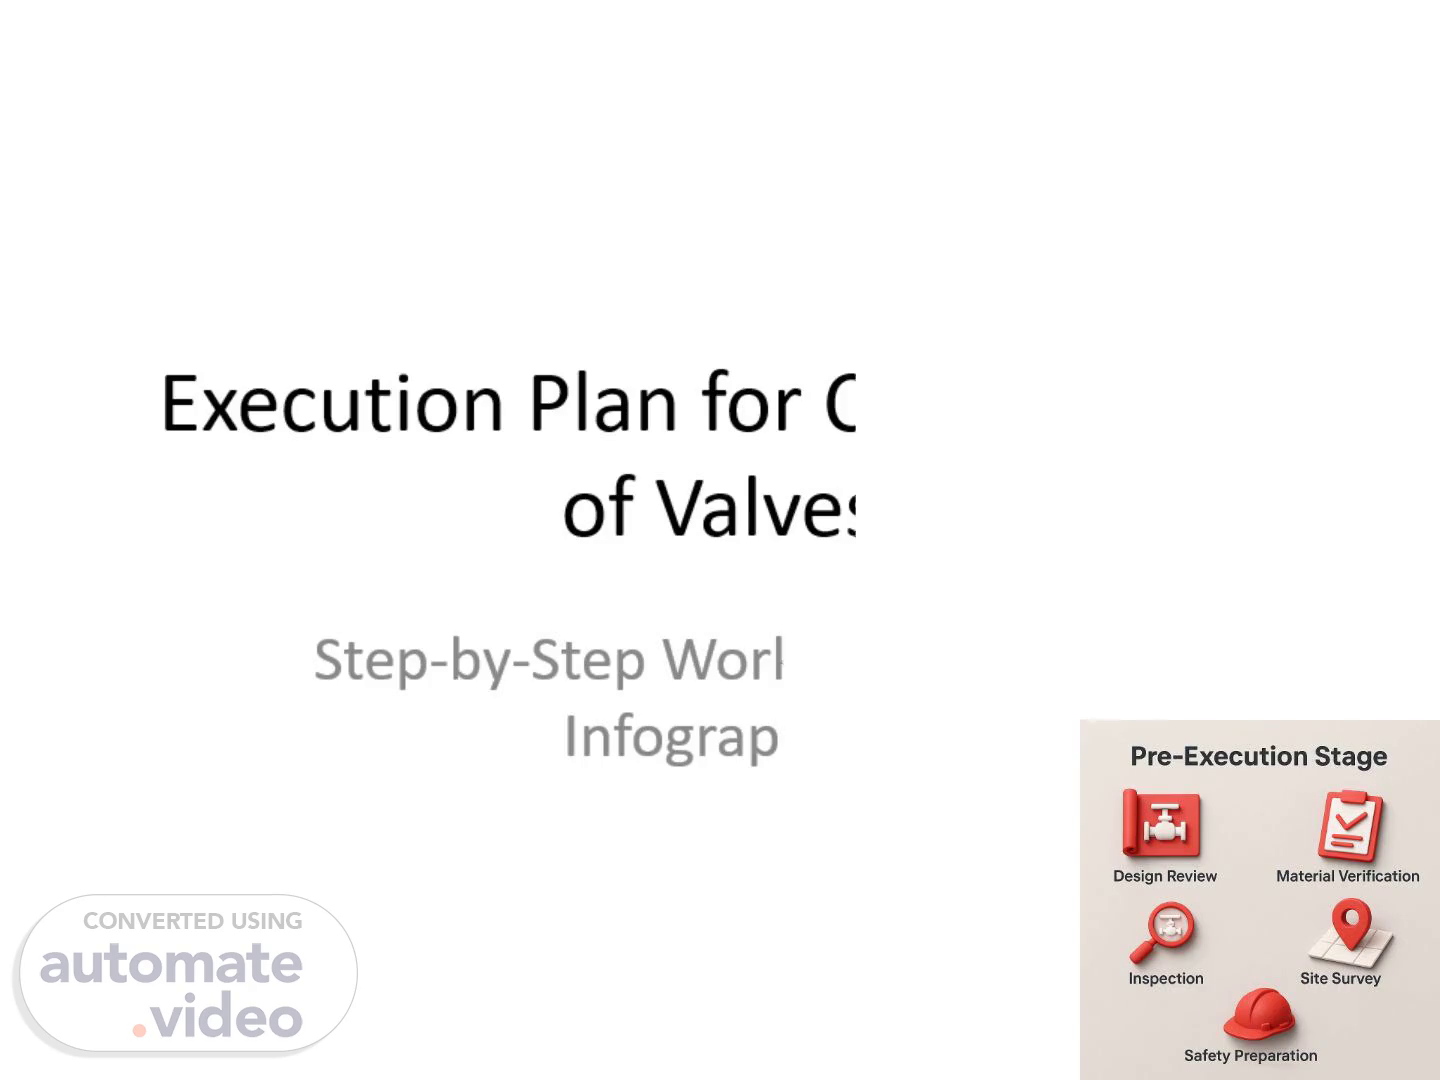
Scene 2 (50s)
[Audio] Today, we will be discussing the execution plan for the construction of valves in our presentation "Execution Plan for Construction of Valves: Step-by-Step Workflow with 3D Infographics". This slide will focus on the various steps involved in the plan. The first step is the Design Review, where P&IDs, datasheets, and drawings are verified for accuracy and alignment with project specifications. Following that, the Material Verification step ensures the suitability of valves for the project by checking their type, size, rating, and material. Inspection is the next step, where FAT certificates and quality assurance documents are checked for compliance with project requirements. Site Survey comes next, where we confirm valve locations and accessibility at the construction site for a smooth installation process. Finally, Safety Preparation involves conducting a risk assessment and ensuring compliance with Personal Protective Equipment (PPE) for the safety of workers. Thorough and efficient completion of these steps is crucial for a successful construction process. This concludes our discussion of slide number 2. The next slide will cover the main construction process..
Scene 3 (2m 10s)
[Audio] Slide number 3 presents the Execution Plan for Construction of Valves, which includes a detailed step-by-step workflow with 3D infographics. To ensure the successful execution of valve construction, it is crucial to follow important steps. The third step involves the proper storage and handling of the valves. It is essential to store the valves in a clean and dry area with covers to prevent external factors from affecting their quality. Exposure to dust, moisture, or other contaminants can lead to corrosion and damage, resulting in decreased performance. For heavier valves, it is recommended to use lifting equipment to avoid physical strain and accidents, ensuring the safety and well-being of workers. Plastic valves should also be protected from direct sunlight exposure, as UV rays can cause deterioration and weakening of the material, potentially causing leaks and malfunctions. It is also important to segregate tested and untested items to prevent confusion and ensure that only approved valves are used in the construction process. By following these measures, we can guarantee the quality and efficiency of our valve construction project. Let's continue with the next step in our workflow..
Scene 4 (3m 24s)
[Audio] Slide number 4 will focus on the step-by-step workflow for constructing valves. This plan is crucial for the successful completion of any valve installation project. Each step must be carried out carefully and precisely to prevent future complications. The first step is preparation, which involves flushing the pipeline and ensuring the gaskets and bolts are in good condition. This ensures a smooth start to the installation process. Next is the positioning stage, where it is important to follow the manufacturer's instructions and pay attention to the arrows. It is also crucial to check the disc clearance to avoid problems. Once the valve is in the correct position, it is fixed in place using the correct torque and lubricant on the bolts. Properly aligning the flanges is also essential for a secure attachment and functioning valve. There are special considerations to keep in mind depending on the type of valve being installed, such as ball, gate, and globe valves. These may require specific conditions for optimal performance. By following this workflow and considering these factors, we can ensure a successful and efficient valve construction. This will result in a high-quality installation and a properly functioning valve for the project..
Scene 5 (4m 42s)
[Audio] We are currently on slide number 5 out of 8, focusing on the Execution Plan for Construction of Valves. This slide will cover the step-by-step workflow and include 3D infographics to aid in understanding the process. The key areas to be discussed are visual checks, pressure testing, operational testing, and documentation. These steps are vital in ensuring the safety and functionality of the final product. Visual checks play an important role in identifying and addressing any potential issues. Orientation, support, and access are all aspects that need to be carefully inspected before proceeding with construction. Pressure testing, which can be done using hydrostatic or pneumatic methods, is necessary to check for leaks or weaknesses in the valve. This step is crucial in ensuring the reliability of the valve. Operational testing is also an essential part of the construction process. The valve is subjected to a series of open and close cycles to assess its functionality. This is important in ensuring that the valve can effectively perform its intended purpose. Lastly, detailed documentation of all tests, results, and any required certificates or reports is crucial in ensuring the quality and safety of the valves. To summarize, this slide provides a better understanding of the step-by-step workflow for constructing valves and emphasizes the significance of visual checks, pressure testing, operational testing, and documentation. All of these steps are critical in guaranteeing the reliability and functionality of the valves..
Scene 6 (6m 22s)
[Audio] We are now on slide number six of our presentation on the execution plan for the construction of valves. This slide focuses on the step-by-step workflow with 3D infographics. The first step in our execution plan is to flush the pipelines to remove any debris accumulated during construction. This is important to ensure proper valve functionality and avoid potential issues in the future. The next step is the leak test, which is vital in testing for potential leaks at operating pressure. Any leaks can cause significant problems and affect the overall functionality of the valves. The integration process involves connecting the valves with the building management system or SCADA system for centralized control. The handover stage is when all necessary documents are provided to the client for smooth operation and maintenance of the valves. This step-by-step workflow with 3D infographics is crucial for our execution plan and guarantees the proper functioning of the valves for our clients..
Scene 7 (7m 24s)
[Audio] We are now on slide number 7 out of 8 in our presentation on the execution plan for construction of valves. This particular slide discusses the step-by-step workflow with 3D infographics. The first important task in this execution plan is to tag all valves for asset tracking. Training the site team on the operation of these valves is also essential. A preventive maintenance schedule must be in place for the valves to ensure their longevity and proper functioning. Properly following this execution plan is crucial for a smooth and successful construction process. By tagging the valves, training the site team, and implementing a preventive maintenance schedule, we can achieve a high-quality and efficient end result. This concludes our discussion for slide number 7..
Scene 8 (8m 14s)
[Audio] We have reached the final slide of our presentation, which is slide number eight. Throughout this presentation, we have discussed the execution plan for the construction of valves, and now it is time to take a closer look at the step-by-step workflow with 3D infographics. As a teacher in a school, my goal is to provide a clear and concise understanding of this process. Let's begin with the first step of the workflow: the creation of operation and maintenance manuals, also known as O&M manuals. These manuals serve as a guide for the proper use and maintenance of the valves. It is crucial to have these manuals to ensure the long-term performance of the valves. Moving on to the second step, we have the preparation of a spare parts list. This step is essential in ensuring the availability of spare parts for the valves. It is important to have a comprehensive list of spare parts to prevent any delays in the event of a malfunction or breakdown. The third step of the workflow involves obtaining and reviewing the warranty documents from the valve manufacturer. These documents are important for understanding the coverage and duration of the warranty and any maintenance requirements. Lastly, we have the final report and handover. This step marks the completion of the construction of valves, and the final report and handover serves as a record of all the work done. It includes the documentation of the installation process, any testing and commissioning, and the final acceptance of the valves. In conclusion, the execution plan for the construction of valves is a complex process that requires attention to detail and precise execution. The step-by-step workflow with 3D infographics has provided a visual representation of this process. We hope this presentation has given you a better understanding of the construction of valves. Thank you for your attention and participation in this presentation. We would like to express our gratitude to the audience for their valuable time. We hope this knowledge will benefit them in their future endeavors. Thank you..